Practice Occupational Health and Safety
LO 1. identify health hazards and occupational risk; and
LO 2. observe occupational and safety practices.
LO 2. observe occupational and safety practices.
Definition of Terms
Electronics Laboratory - a place where activities pertaining to electronics projects are done
Electric shock - effect on animal body on sudden discharge of electricity
Electrostatic discharge - releasing of the electrical charges produced by the human body to ground
Gloves - covering of leather, cotton, silk, etc for the hand usually with separated fingers.
Goggle - spectacles for protecting eyes from glare, dust, and other pollutants.
Hazard - something causing danger
Mask - covering for concealing the face
Maintenance - keeping up with an A1 operation
Occupational health - pertaining to wellness of an individual with reference to an activity or job in an electronics lab
Personal Protective Equipment - (PPE) equipment used to protect one’s body from hazards and danger of the electronics trades Risk - exposure to something unpleasant
Safety practices - set of rules or procedure intended for a safe execution of a certain activity or job in a laboratory
5S - five actions that start with letter S that helps in the arrangement of things in a laboratory Systematize. Sort, Sweep, Self discipline, Sanitize
Systematize - arrange methodically things in a laboratory
Standardize - to make things in same features or level in quality or achievement
Sort - arrange things according to kinds, types, or classification
Injury - damage or harm caused to the structure or function of the body caused by an outside agent or force, which may be physical or chemical
Cuts - break in the skin inflicted by sharp objects
Burns - damage in the skin caused by exposure to fire or excessive heat
Fire extinguisher - an equipment of chemicals intended to terminate or extinguish fire
First Aid Kit – medicine for initial treatment of any wounds inflicted to a person
What Do You Need To Know?
1. Electrical hazards. Electrical hazards are the type of risks that are more likely fatal than any other hazards that can happen in a laboratory room. Electrical hazards such as electrical shocks from open wires, grounded electrical appliances can be found anywhere in a disorganized laboratory area.
2. Hazards from improper use of hand tools. Hand tools are classified into cutting tools, driving tools, boring tools, joining tools, and measuring tools. Cutting tools may inflict injuries when improperly handled due to its sharp edges that can cut through the skin of the human body
Driving tools Driving tools like screw drivers and hammers, when used improperly can break human flesh or fracture bones which are very painful to an individual.
Boring tools Drill bits, Center punch, and reamer are boring tools. These tools also do damage when not properly used.
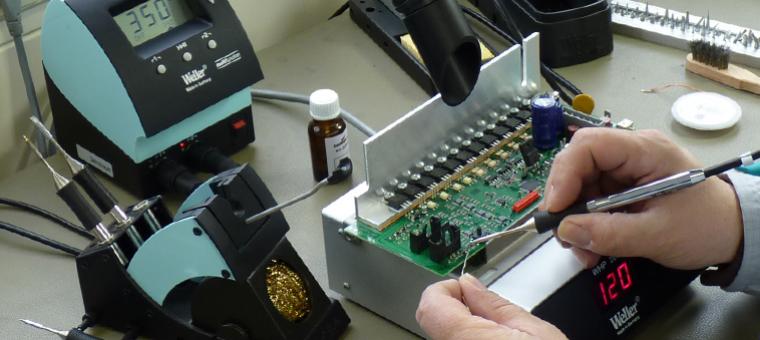
Soldering tools Soldering tools such as soldering iron, soldering gun and hot air soldering causes extreme heat and burn in the skin when improperly used.
2. Hazards from improper use of hand tools. Hand tools are classified into cutting tools, driving tools, boring tools, joining tools, and measuring tools. Cutting tools may inflict injuries when improperly handled due to its sharp edges that can cut through the skin of the human body
Driving tools Driving tools like screw drivers and hammers, when used improperly can break human flesh or fracture bones which are very painful to an individual.
Boring tools Drill bits, Center punch, and reamer are boring tools. These tools also do damage when not properly used.
Soldering tools Soldering tools such as soldering iron, soldering gun and hot air soldering causes extreme heat and burn in the skin when improperly used.
TOOLS MAINTENANCE and SAFETY RULES
1. Be sure to inspect tools before using them. This is to check if they are in good working condition. The evidence is when you are able to use them smoothly and conveniently with ease and comfort.
2. After using a tool, clean it thoroughly with a damp cloth before keeping it in a tool box or cabinet.
3. Oil the metal parts of a tool to prevent any form of damage caused by air, water, or rust.
2. After using a tool, clean it thoroughly with a damp cloth before keeping it in a tool box or cabinet.
3. Oil the metal parts of a tool to prevent any form of damage caused by air, water, or rust.
The following safety rules should be understood and strictly followed to avoid accidents while working
1. Avoid wearing loose clothing when working. Sleeves should be fit and shirts tucked in as much as possible. Remove ties, watches, rings, and other jewelry from your body.
2. Report immediately injuries or accidents of any type to your teacher.
3. Never put fasteners or any small metal articles in or near the mouth when working.
4. Never throw tools of any type around. Make sure the sharp edge of cutting tools are away from the edge of the table or work bench.
5. Keep working areas clean and free from disposable materials.
6. Secure the help of your classmates when carrying heavy tools to avoid accidents.
7. Never use dull or damaged tools.
8. Do not use tools with loose handles and ragged. Report cases like these to the teacher and do necessary repair and adjustments, if possible.
9. Know and observe safety measures specific for each tool or operation.
Safety Requirements
For your protection, observe the following safety requirements:
Follow all cautions, warnings, and instructions marked on the equipment.
Ensure that the voltage and frequency rating of the power outlet matches the electrical rating labels on the system.
Use properly grounded power outlets.
Follow all cautions, warnings, and instructions marked on the equipment.
Ensure that the voltage and frequency rating of the power outlet matches the electrical rating labels on the system.
Use properly grounded power outlets.
Hand Tool Design, Selection, and Setup
1. Weight - Use the lightest weight tool possible to avoid injury. Excessively heavy tools must be equipped with mechanical support and attached hoses should be supported. Support - Equip tools with some means of mechanical support so you don't need to hold a heavy tool continuously while working. If mechanical support cannot be provided, the workstation should be designed so you can put the tool down or rest it in a holster when it is not in use.
2. Balance - Additional force is required to use an unbalanced tool. The tool's center of gravity should be close to the body, close to the handles, and in line with the center of the hand holding the tool.
3. Torque Control - High torque requires a lot of force to keep the tool from rotating out of your hand. Torque settings should be set to the minimum required by job specifications, especially for in-line and pistol-shaped tools.
4. Grip - Tool handles should allow stable and efficient grip. The handle should be cylindrical or oval in shape, with a diameter of between 1.25 and 1.75 inches. Tool handles should contact as much of the hand and fingers as possible. Grips should be made of non-slip compressible and nonconductive material. Avoid form-fitting handles (handles with finger grooves), since they may not fit the hand size of every user. Handles should be kept clean and free from slippery grease, oil, or sweat.
5. Span - On two-handled manual tools, like pliers, the open span should be about 4 inches and the closed span should only be about 1.5 inches.
6. Spring-loaded handles - A spring-loaded mechanism saves muscular effort and reduces mechanical stress on the backs and sides of fingers for such tools as scissors, pliers, and other manual cutting and gripping tools which have to be opened and closed repeatedly during use.
7. Choose the right tool shape - Pistol-shaped tools should be used on a vertical surface or on a horizontal surface below waist height. Bend the tool, not the wrist.
8. Avoid bending over your work.
9. Avoid overhead work if possible. Use a ladder to reduce the need for outstretched arms.
10. Keep the elbows close to the body
11. Tilt the work surface instead of the wrist.
12. Stand with weight evenly distributed on both feet. When standing for long periods of time, rest one foot on a sturdy object above floor height and switch legs periodically.
13. Sit up straight so the chair offers good back support. Adjust the chair back so it comfortably supports the natural curve of the lower back. Adjust the seat height to allow thighs to be parallel to the floor.
